

Blog Category
 Mobile App Testing(45)
 Web App Testing(38)
 Game Testing(22)
 Automation Testing(31)
 Security Testing(18)
 Performance Testing(15)
 Selenium(12)
 Test Management(10)
 Usability Testing(9)
 Guides and Tutorials(20)
 Best Practices(14)
 Expert Insights(8)
Software Testing Events(5)
 Software Testing Events
Our Services
 Load Testing
 Performance Testing
 Hire a Tester
20 Steps to Configure Jenkins Email Notification
September 14th, 2017
Emails have been an important aspect in every business due to its ease of use, omnipresence, and availability.
Several plug-ins are available in the market that allows you to configure every aspect of email notifications, one of which we are going to see now is Jenkin (Jenkins Email notification).
Jenkins email is a freeware software that allows continuous integration and delivery of ongoing projects.
You can customize it based on when an email is sent, who should receive it, and what the email says.
It is platform independent for testing and reporting changes in the base code in real time.
The software is installed on the main servers to access it centrally.
Jenkin Email notification is a Java-based plugin tool to automate notification alert whenever an Email is received.
It suits best for the CI (Continuous Integration) code.
 Its plug-in framework makes it highly adaptive and Master-Slave framework makes it highly scalable, which in turn makes it worthy for start-up/Labs and big enterprises at the same time.
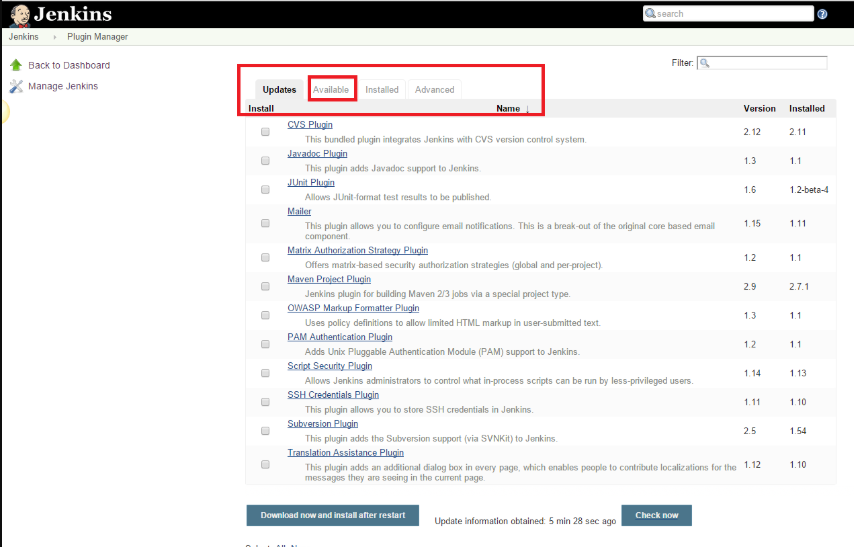
 4. Click the available tab on manage plugin page.
 5. On the filer field displayed on the right-hand corner of the screen, start typing ‘Notification’.
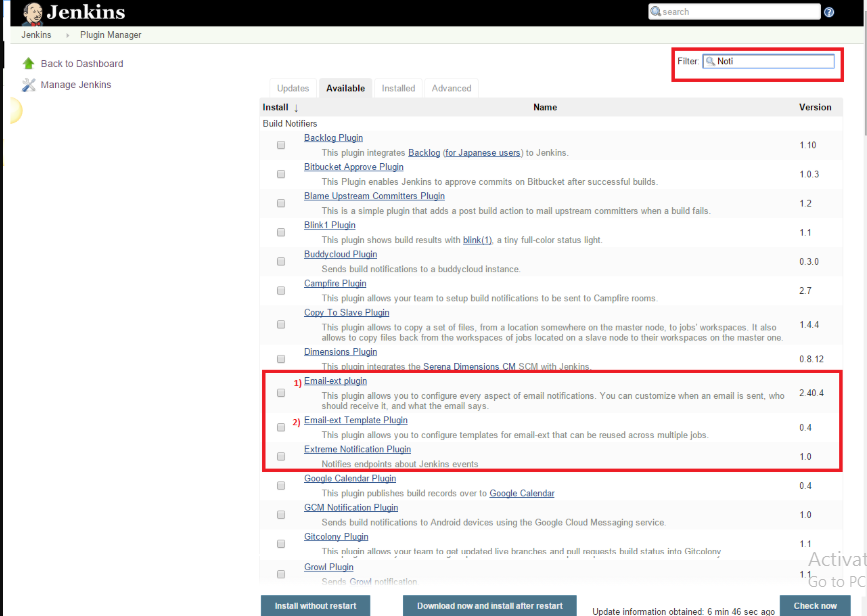 6. Click the checkbox next to ‘Email-ext plugin’ option and install it.
7. Now click the checkbox next to ‘Email-ext Template Plugin’ and click the install without restart button
6. Click the checkbox next to ‘Email-ext plugin’ option and install it.
7. Now click the checkbox next to ‘Email-ext Template Plugin’ and click the install without restart button
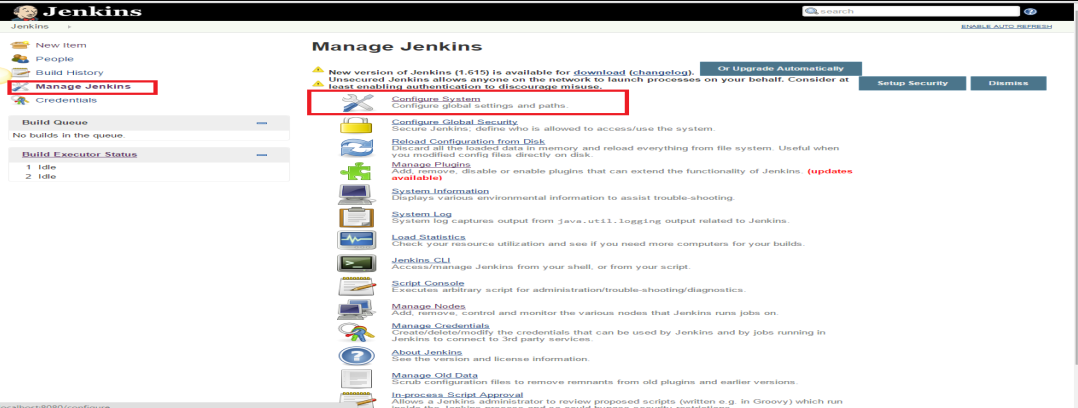
 8. Go back to manage Jenkin, select the configuration system option.
 9. Enter the SMTP server name, Email address, and password, check SSL and enter SMTP port
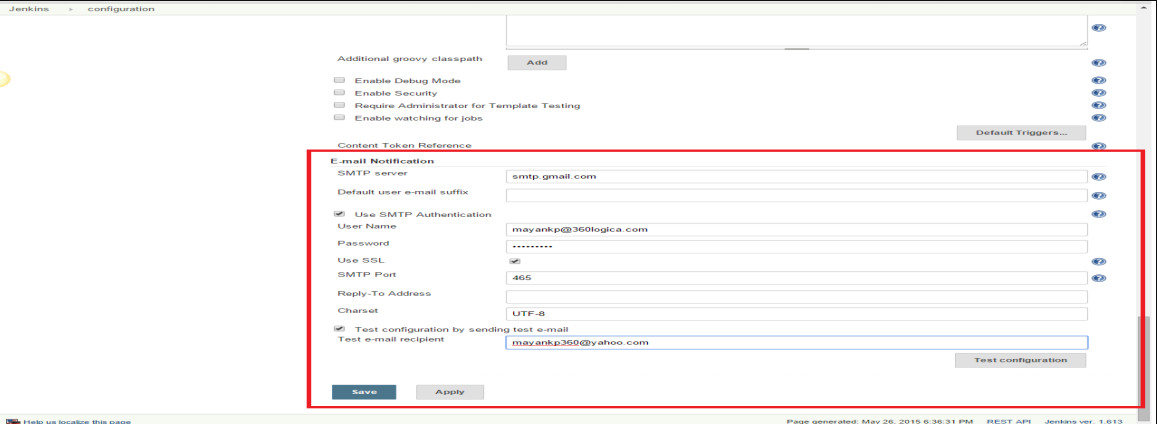 10. Test the Jenkin Email notification by sending a test email
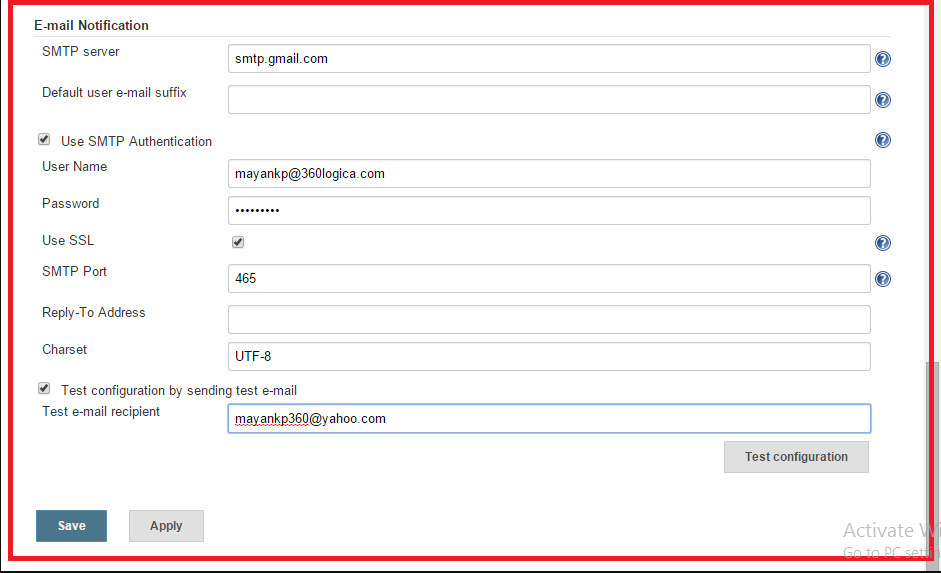 11. Save the settings
To configure the advanced properties for the plugin, click on the Override Global settings check box, then click the advanced button. This allows you to define recipients for every type of email trigger and also a pre-send script that can be used to modify the email just before sending.
11. Save the settings
To configure the advanced properties for the plugin, click on the Override Global settings check box, then click the advanced button. This allows you to define recipients for every type of email trigger and also a pre-send script that can be used to modify the email just before sending.
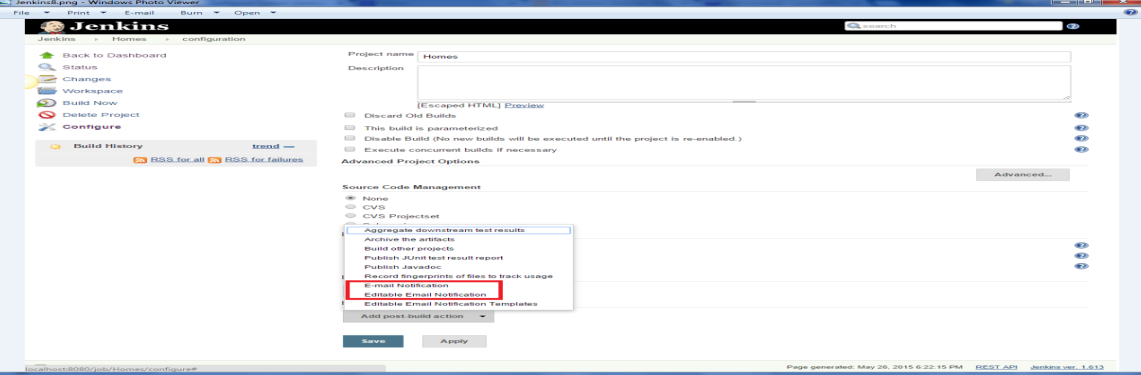
 14. Select the email notification value
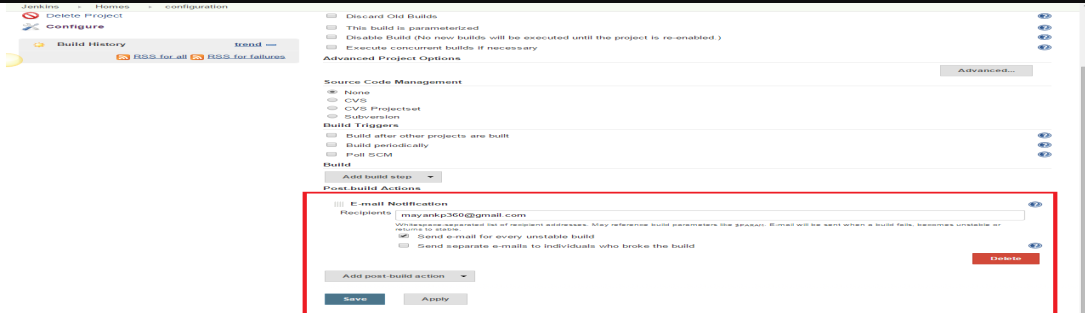
 15. Enter the email ID of the recipient in the Email Notification box. Click the box next to it which says ‘Send e-mail for every unstable build’ option.

 Conclusion
The main objective of using Jenkins in emails is to install and successfully configure the email-ext plugin.
Jenkins, is an open-source tool that can be used to perform Continuous Integration and build automation.
Using it, the development process can be easily integrated and the results are automatically created and tested, thus making identification of errors easier.
Conclusion
The main objective of using Jenkins in emails is to install and successfully configure the email-ext plugin.
Jenkins, is an open-source tool that can be used to perform Continuous Integration and build automation.
Using it, the development process can be easily integrated and the results are automatically created and tested, thus making identification of errors easier.
Its plug-in framework makes it highly adaptive and Master-Slave framework makes it highly scalable, which in turn makes it worthy for start-up/Labs and big enterprises at the same time.
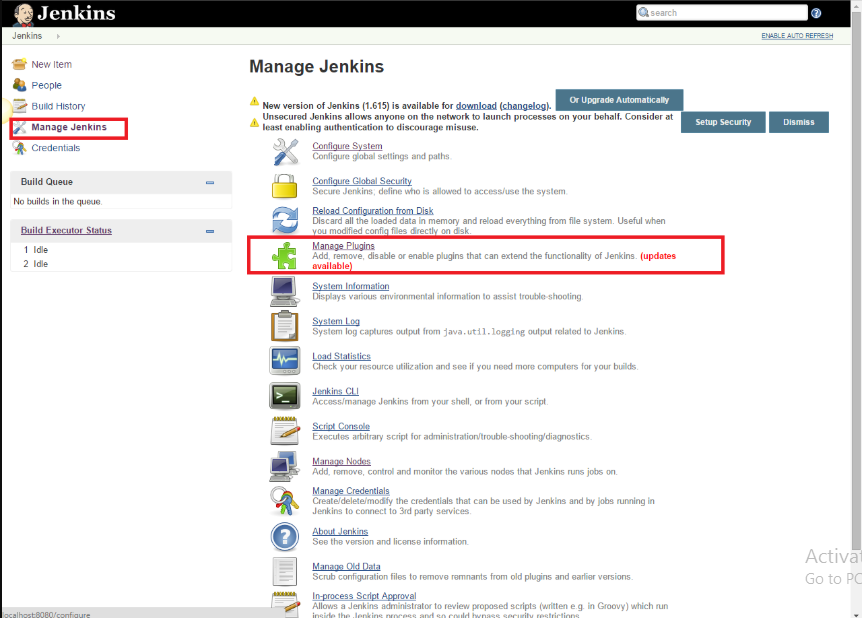
Steps to Configure Email Notification using Jenkin
Jenkins email notification configuration is a step by step protocol: 1. Install Jenkin 2. Open Jenkin on a local host. Setting up an SMTP server, navigate to Manage Jenkins (Manage Jenkins options is displayed on the right-hand side of the screen) 3. Once on the Manage Jenkins page, select the manage plug-ins option
4. Click the available tab on manage plugin page.
5. On the filer field displayed on the right-hand corner of the screen, start typing ‘Notification’.
6. Click the checkbox next to ‘Email-ext plugin’ option and install it.
7. Now click the checkbox next to ‘Email-ext Template Plugin’ and click the install without restart button
8. Go back to manage Jenkin, select the configuration system option.
9. Enter the SMTP server name, Email address, and password, check SSL and enter SMTP port
10. Test the Jenkin Email notification by sending a test email
11. Save the settings
To configure the advanced properties for the plugin, click on the Override Global settings check box, then click the advanced button. This allows you to define recipients for every type of email trigger and also a pre-send script that can be used to modify the email just before sending.
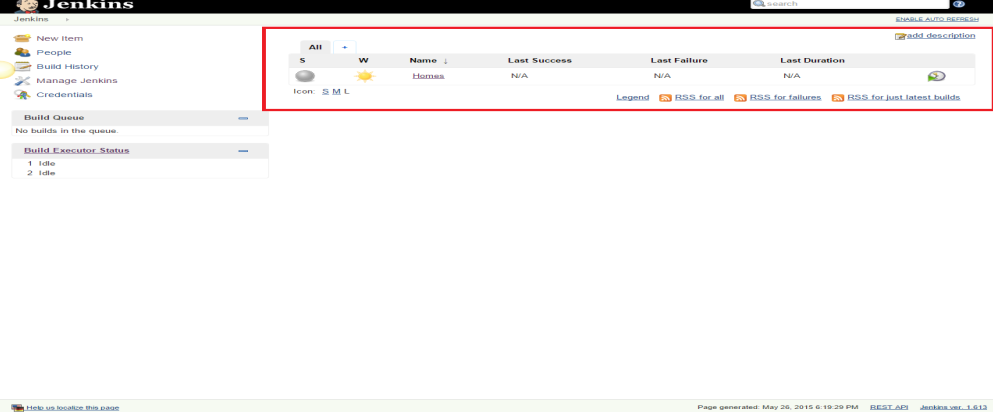
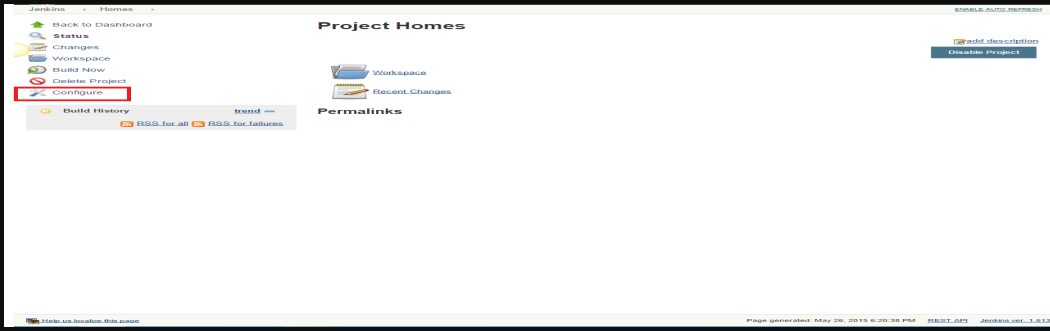
- go to the home page , click created job and then ‘configure’
Know More: Top 10 Manual Testing Tools for 2019
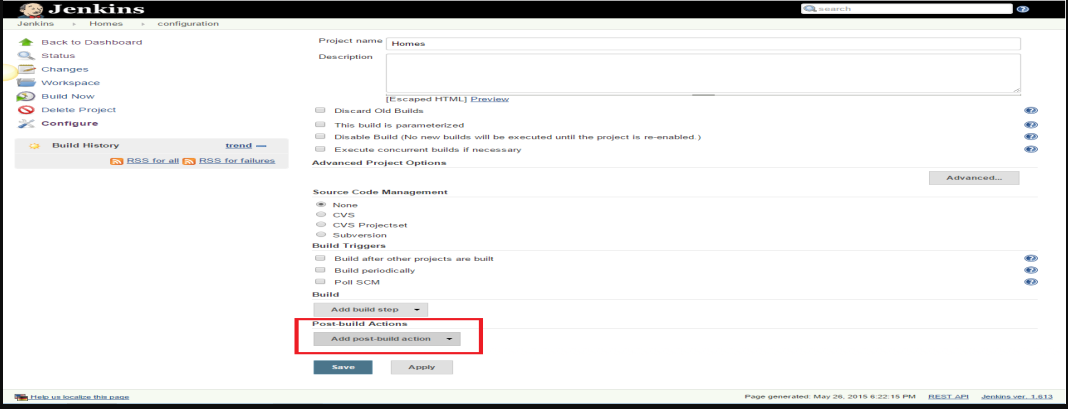
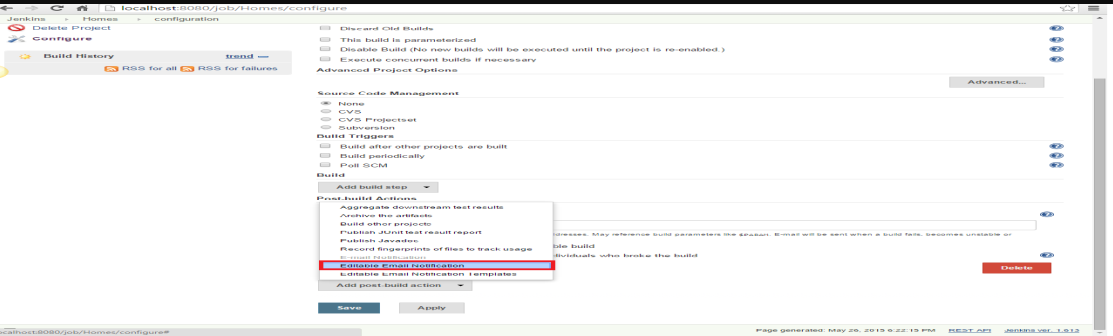
- you can also see a dropdown with the name ‘Add post-build action’
14. Select the email notification value
15. Enter the email ID of the recipient in the Email Notification box. Click the box next to it which says ‘Send e-mail for every unstable build’ option.
- Click the Add-post-built action button again and select the ‘Editable Email Notification’ value
- Fill the fields and then click the advanced settings option in the editable email notification box
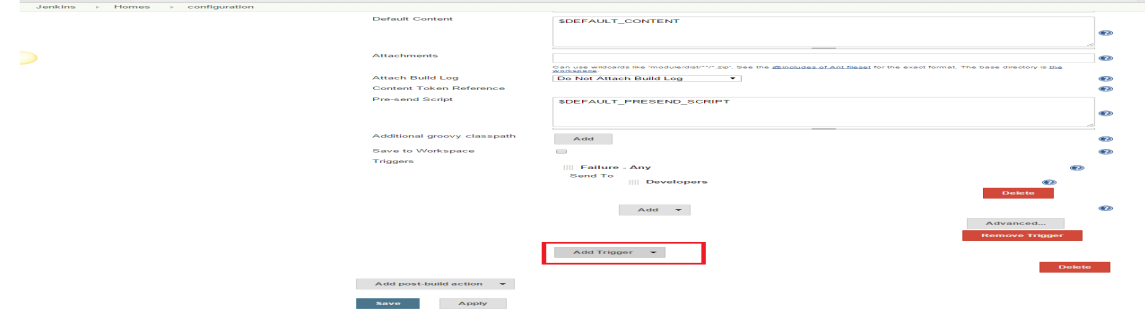
- Project Recipient List : email_id@gmail.com
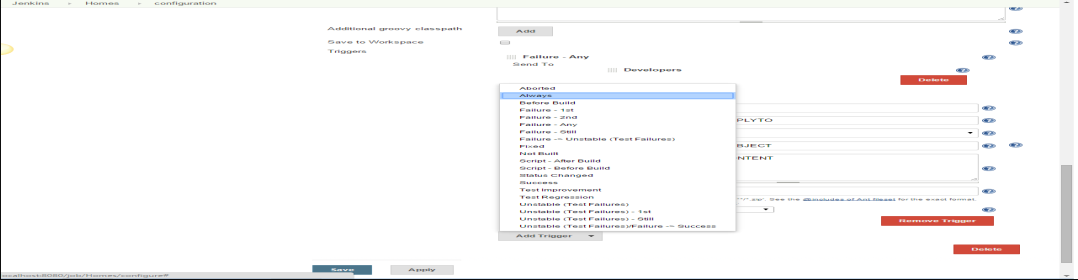
- Next you have to click ‘ Add trigger ‘ and then select always
- Click ‘Save’
- go to home page, click job and then ‘build now’
Conclusion
The main objective of using Jenkins in emails is to install and successfully configure the email-ext plugin.
Jenkins, is an open-source tool that can be used to perform Continuous Integration and build automation.
Using it, the development process can be easily integrated and the results are automatically created and tested, thus making identification of errors easier.
Get a eBook : Download PDF

Recent Posts
- Positive Vs. Negative Testing: Examples, Difference & ImportanceApril 22nd, 2024
- What Is Statement Coverage Testing? Explained With Examples!April 13th, 2024
- 60 Important Automation Testing Interview Questions & AnswersApril 2nd, 2024
- Verification vs. Validation: Key Differences and Why They MatterMarch 19th, 2024
- What is Compatibility Testing? Example Test Cases Included!March 18th, 2024

Search Results for:
Loading...
Overview
Services
Industries


Follow us on
Contact Us
Copyright © 2026 | Digital Marketing by Jointviews